Posts

Showing posts from January, 2023

Fifers- Youth

Image
 Fifers Youth Cowdenbeath After School Club Plan To create an editorial Image for a planned exhibition on 'Fifers'. The key word I was given was 'Youth' so I decided to base my image on the childcare shortage crisis In Fife. My thought process behind this was a recent experience my local After School club faced when they they were at risk of having to close their doors due to not being able to find a new premises in order to house their business. Their current building was no longer accessible to use. This would in turn cause the local childcare in the area to face a detriment due to the already shortfall in childcare being available. Local councillors were involved as well as a small media coverage to try and help this club who is massive part of the community.  Cowdenbeath After School club to Reopen Mood Board Cowdenbeath After School Club premise colourful hands/laughter playing equipment DSLR Lighting Key Elements Founder of Cowdenbeath After School Club Portrait t

Escape

Image
 Escape Organised planning or Escape Editorial Photography This is a style of photography where an image or images in a magazine support a written article, to help tell a story or educate the reader. Theses are images that give and set the mood. Editorial Portrait Style Escape Possible Diptych Plan My idea is to think out of the box and not use a subject that is consistent with the word escape. To keep in line with the rest of my portfolio creating images around addiction or mental health would prove beneficial and creative. Addiction to gaming Poor mental health Research Image 1 In this image the Mother taking off the child's headset or at least attempting to. The child does not look happy and is trying to prevent his headset being removed by holding the adults arms. The look the child is giving is both trying to concentrate and annoyed that he is being disturbed. The image is in center view and the focus is drawn to the little boys expression. This image seems to have been taken

Supplementary Lighting

Image
 Supplementary Lighting Research- Bridal prep using Supplementary Lighting Image 1 Style- Wedding portrait with Bridal party Lighting- Natural Daylight with the use of potential speed light Composition- Center aligned, all models looking at camera with natural smile and sitting pose on bed Context- High key image, light and whites used only and in surrounding room Research Image 1 style, lighting,composition content  Research Image 2 Style- Natural candid style portrait with bride and bridal party Lighting- Natural daylight, window lighting with use of speed light Composition- Filling the frame Context- Natural candid pose, nobody looking at camera, nice high key tones to suit wedding image. Research Image 2 Contact Sheets Plan My idea is to create a high key image from a wedding shoot that will include the bridal party. I plan to use window lighting as well as supplementary lighting in the form of a speed light.  The location is local but it is expected to be a busy morning. Wedding p

Soft Proofing

Image
Soft Proofing Soft proofing converts the image output profile of the desired printer ready for print. This process can only be achieved with a calibrated monitor. this is the stage before 'hard proofing'. This gives an accurate representation of a digital file on the monitor before it is printed. This visual replaces a digital hard copy.  What is required ? A high quality calibrated monitor A USB instrument Custom ICC Colour accurate software Colour Profiles  In Adobe Photoshop, the first process is to use a designated software to calibrate your monitor. This will ensure you images are a close to your image on screen than it can possibly be. Depending on specific winter and paper will determine how you're finished image will produce. In photoshop and custom you can simulate the correct printer used for printing. When printing you are able to select your colour intent. Rendering intent will make your images look as good as possible. By selecting these options you can view on

Light

Image
  Light and the electromagnetic spectrum How to use camera reflectance metering? This meter is usually the on that is located inside of your camera. the readying is taken from the portion of the camera. This isn't reading the measure of light upon the subject but the light falling onto the subject. As a result images can be affected by this given not everything is on the same scale on the grey card.  Hand Held Meter- Incident meter reading. Simply place the meter with the correct settings in place in front of where the light will bounce or where the subject is, then take a reading from the incoming light. It is always best to take 3 readings to be sure. This measures the intensity of light reflecting off the subject as it bounces back to the reader. In some cases must hand help meters are able to read both reluctance and incident light meters.  Photon and electromagnetic spectrum what does Polarising do? Polarising is done by attaching a polarising filter to your camera lens, These

Filters

Image
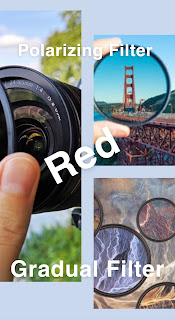
 Filters How do Camera Filters Work? Filters are made up of high quality glass and are typically attached to the from of the camera lens. These filters are used to clock certain colours or light sources from coming into the camera. Nd Filters particularly are designed to reduce the overall light intensity from coming into the camera. Teases filters usually screw on on or slot into place depending on the lens and camera being used.  Polarising Filter https://www.nikonusa.com/en/learn-and-explore/a/tips-and-techniques/polarizing-filters-add-pow-to-pictures.html These filters have the ability to change transmitting light that vibrates in one direction whilst absorbing light that vibrates in a perpendicular fashion. This is what is used in the likes of sunglasses. When these are places over a camera lens it reduces unwanted reflections in your image. https://www.britannica.com/technology/polarizi what does Polarising do? Polarising is done by attaching a polarising filter to your camera le

Theory Colour Temperature

Image
Colour Temperature Florescent 5000k-6500k   Incandescent What is colour temperature? Colour temperature is a way to describe the appearance of light. It is the temperature of an object that fully absorbed all frequencies of light and radiate the same colour as any given object. Colour temperature is measured in Kelvin (K). the higher the number the colder row hitter the colour becomes. There are a variety of different tools available for photographers to alter colour temperature within their images. A Match Light - 1700k A Candle light - 1850k Moonlight - 4100k Daylight -5000k Solar temperature- 5770k Common white light- 6500k Black Body radiation Back body radiation is used to describe or refer to the spectrum of light emitted and completely absorbed all frequencies of light. This is important in Photography as this allows for visible detection of temperature coming from any object, which then allows us to generate an image through our camera. Mixed Lighting This is where more tan one

Formats

Image
Theory In photography the light, film and sensor size all determine image formate ie logo sensitive. It is important to make an exact copy of what we are photographing as the sensor effects the quality. there are a variety of different formats available and these are as follows. This helps us understand about light and how it is used to make images. The Pentaprism https://photographylife.com/what-is-a-mirrorless-camera A pentaprism is a five sided reflective prism used to deviate light by a constant 90 degrees, the light reflects inside the prism allowing transmutation of an image through a rift angle without inverting it. Small Format (DSLR SLR Mirrorless) https://www.manfrottoschoolofxcellence.com/2017/06/formats-for-landscape-photography/ Advantages  Portable Modular Image is viewable right away intuitive use choices for file size more accesable settings more storage Disadvantages not 100% quality enlarging the image won't work well Medium Format (Full frame DSLR Film) https://w